
We’re changing the way of releasing products to letting users experience new features sooner so that the core team can receive feedback and bug reports prior to rolling an official version out. In the new process, users can give new features a try beforehand it is published in the production environment. The first feature that is piloted with this release process is ETH/ERC20 decentralized shielding.
As mentioned in the topic, a user will be able to shield ETH/ERC20 tokens right from his personal wallet, e.g. Metamask, Trust Wallet, etc. – and will no longer need to send funds to a temporary address managed by the Incognito team.
Android users can now experience this feature on a staging app at https://github.com/incognitochain/incognito-wallet/releases/tag/v4.3.10
The app version is pointing to Incognito testnet and Ethereum Kovan testnet so you should not worry about any expense or loss with your real money. The following is how to use the decentralized shielding feature.
Install an Ethereum wallet app
You must have at least 1 Ethereum wallet app that supports WalletConnect on your phone. See the full supported list here: https://registry.walletconnect.org/wallets
We will use Metamask(https://metamask.io/) in this example.
Switching To ETH Testnet (optional)
IMPORTANT: Backup your key (if any) before testing
Switching to testnet is required since you’re testing this new feature out on the staging environment.
Switching to testnet in Incognito Wallet. Going to Settings:
Under Network sections, select to view available networks
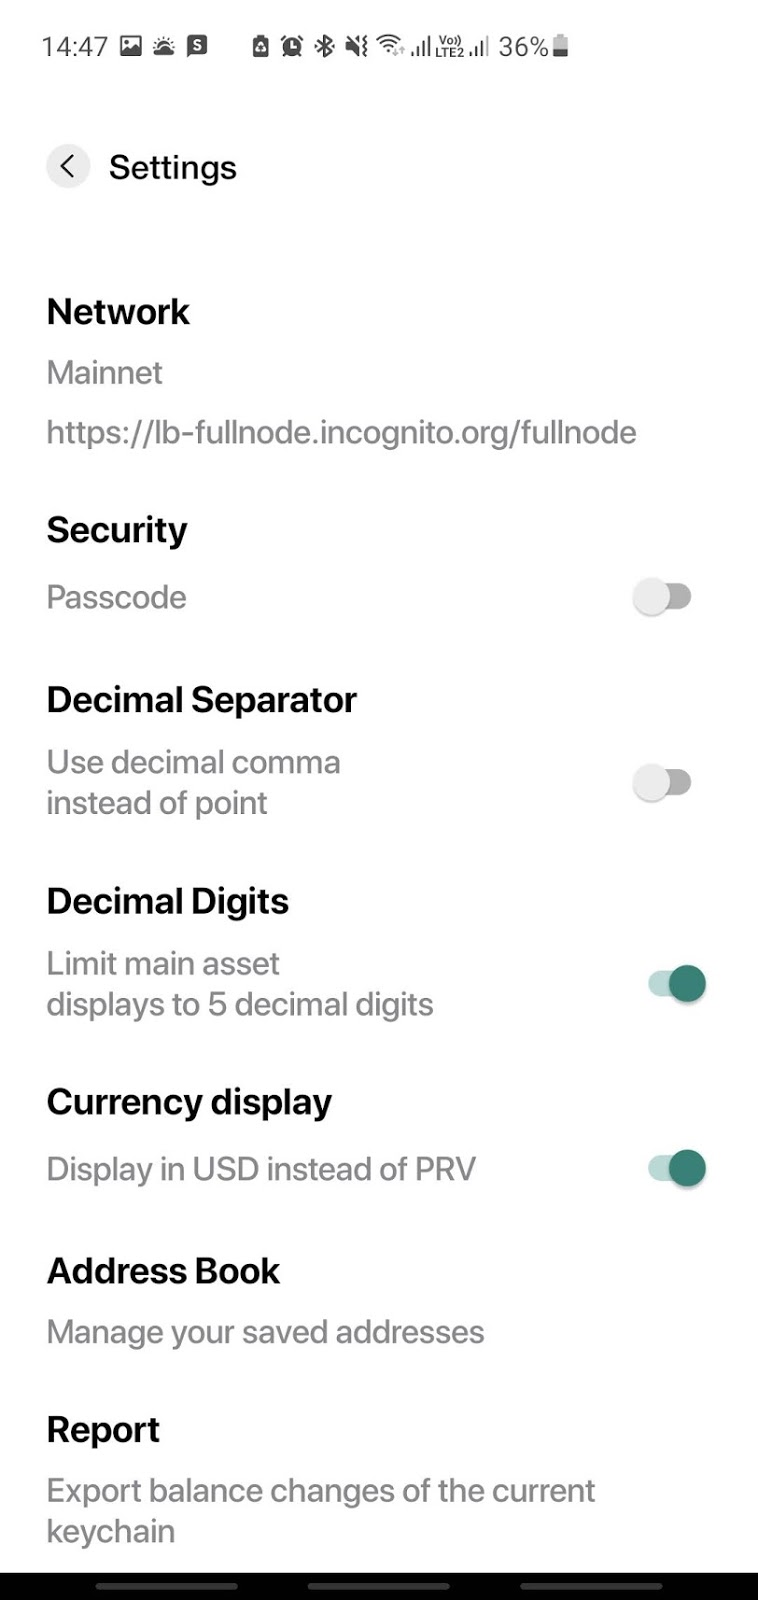
Click several times on “Testnet” network until app starts reloading

Done, you are now using Incognito testnet along with Ethereum Kovan testnet
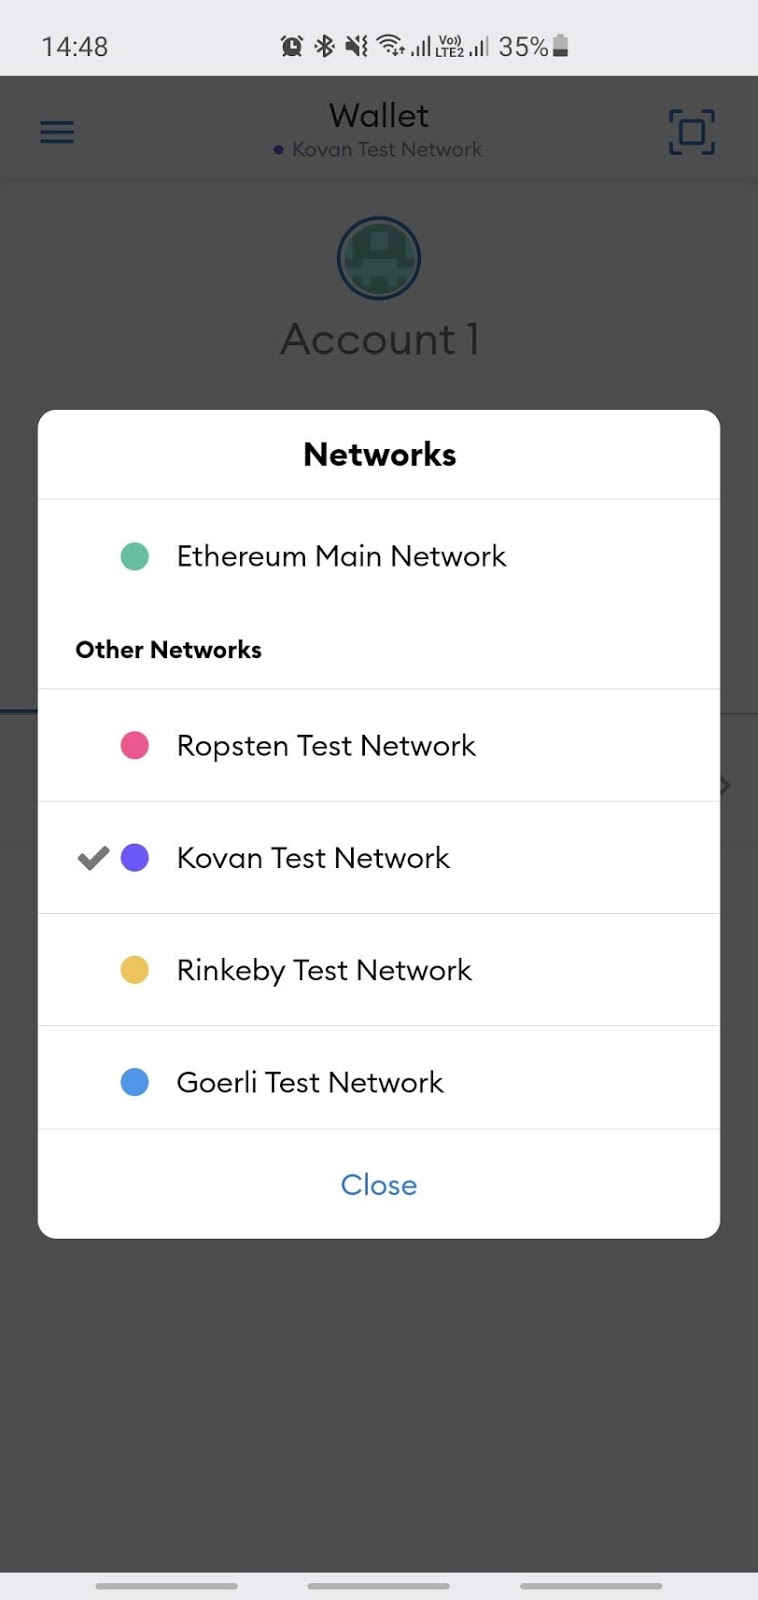
Switching to the Kovan network in the Metamask app.
Tip: you can get 2 ETH in Kovan network at: https://faucet.kovan.network/
or contact us @support to get some tokens for testing.
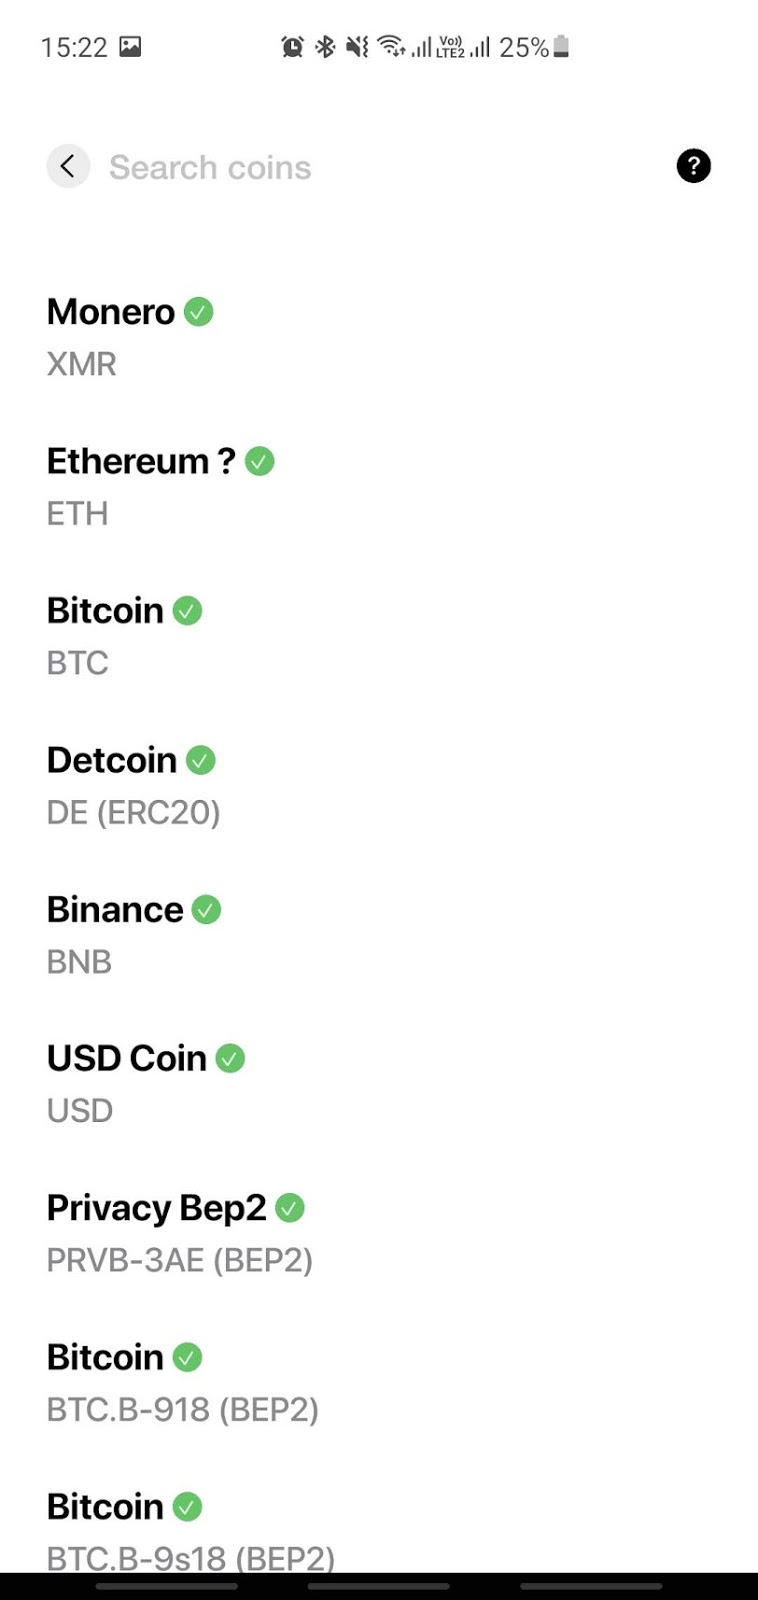
Select crypto you want to shield
The Incognito app currently supports ETH and some ERC20 tokens for this feature. We will use ETH in this example.
Go to Assets -> Shield my crypto and then select Ethereum
Connect Incognito app with 3rd wallet via WalletConnect
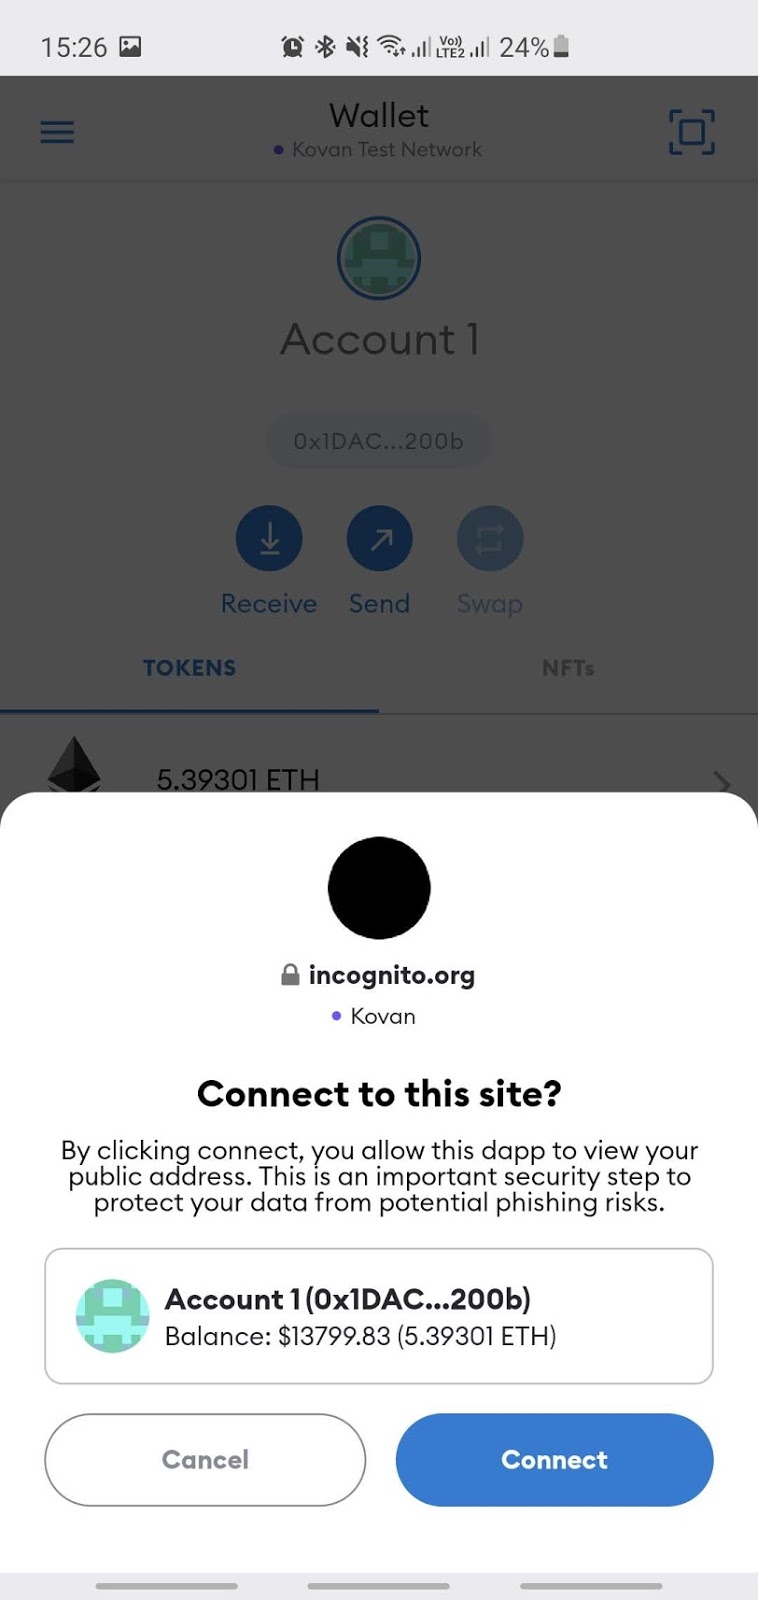
To allow Incognito Wallet to check your balance and send transaction requests, first we need to connect the Incognito app to your wallet (e.g. Metamask). After connecting, Incognito Wallet will now can:
- Getting information about your account: remaining balances, address.
- Creating a new request. Incognito Wallet CAN’T access your keys, assets, transaction histories,… It can only send a request to Metamask in order to create a transaction. All transactions will need your approval before processing.
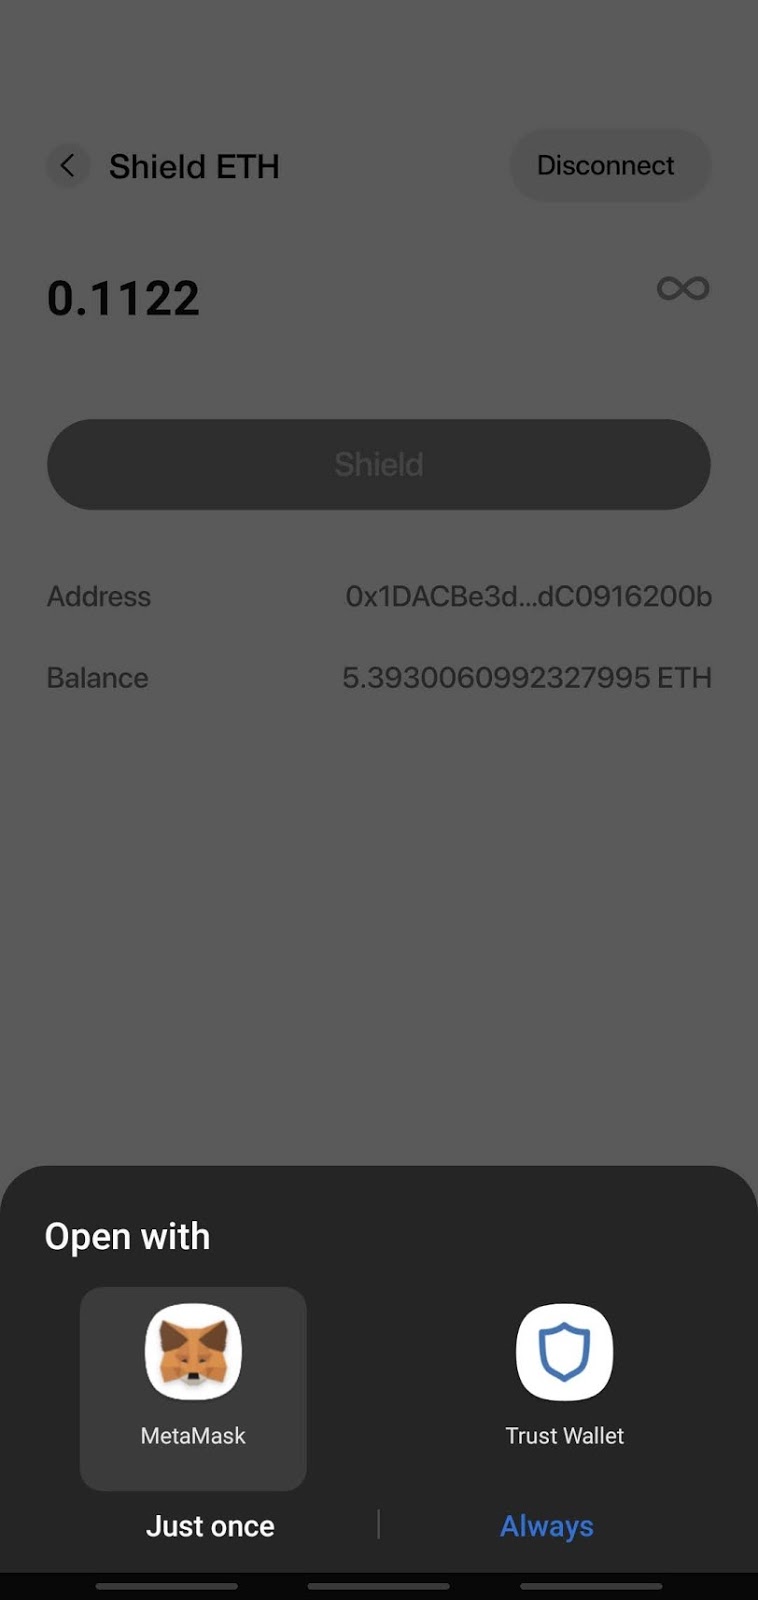
Select “I will shield from my own wallet”

Available Wallets will show up for connection. Click on MetaMask.
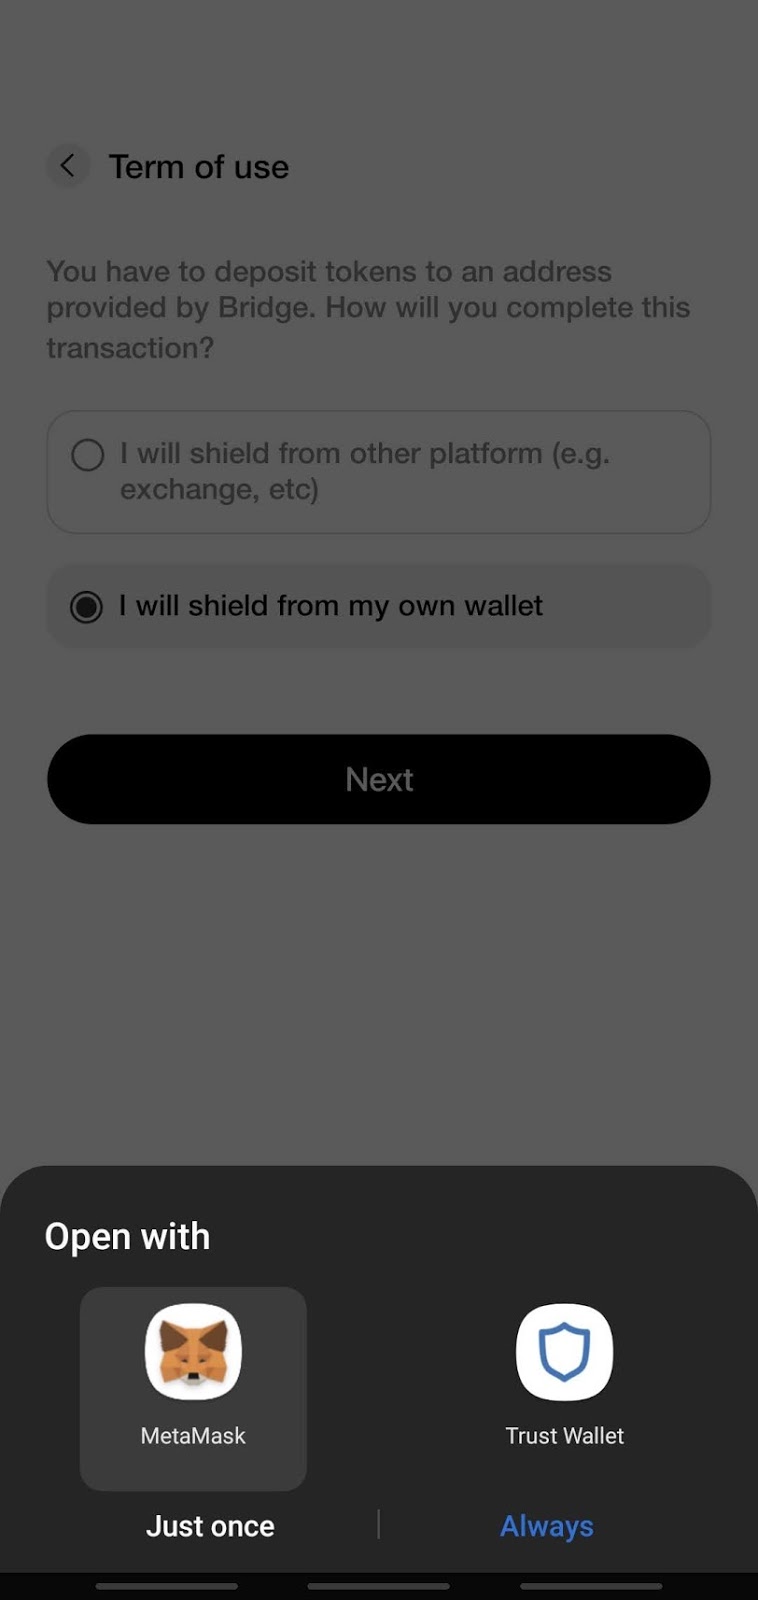
You will now be navigated to the Metamask app, wait a minute till Metamask finishes loading the request. A confirmation box will show up, waiting for your approval to connect. Click Connect now.
Connected, now open back Incognito app
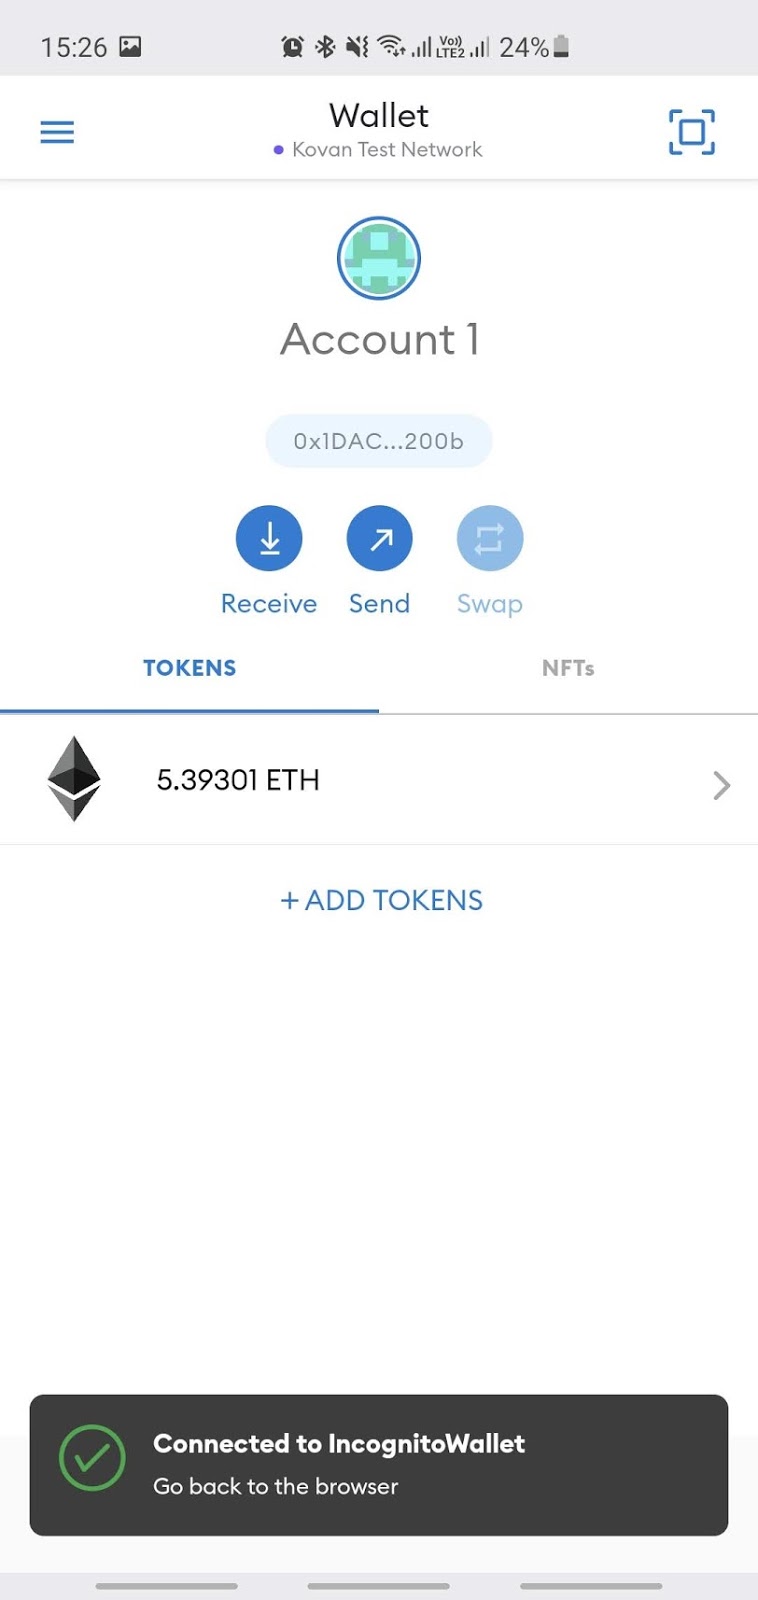
Waiting for a while, the Incognito app will show your account information here when it has successfully connected to your Metamask wallet. You can now start shielding.
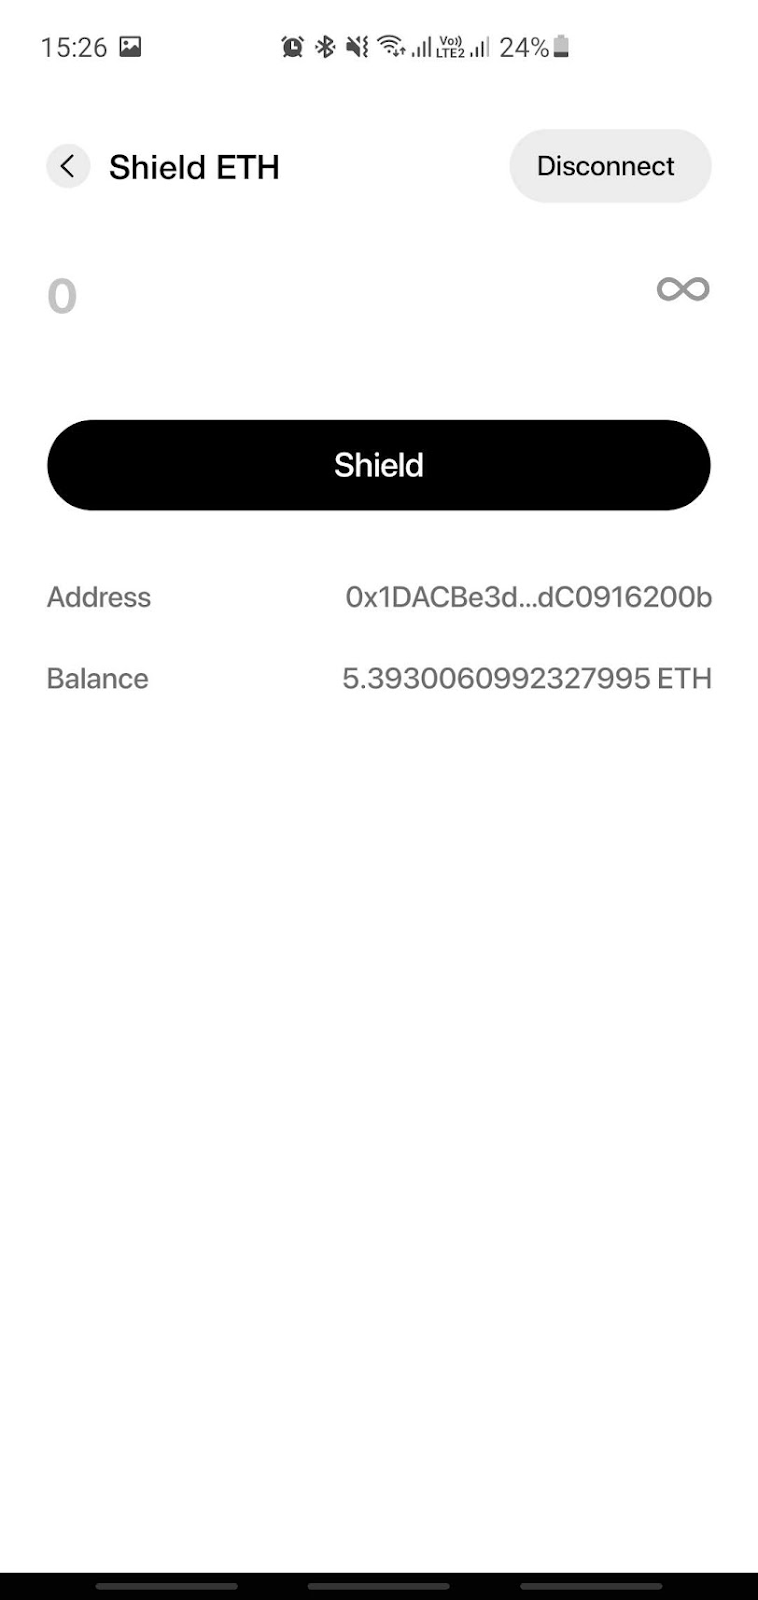
Shield Your Money
After connecting with other wallets, you can now start shielding.
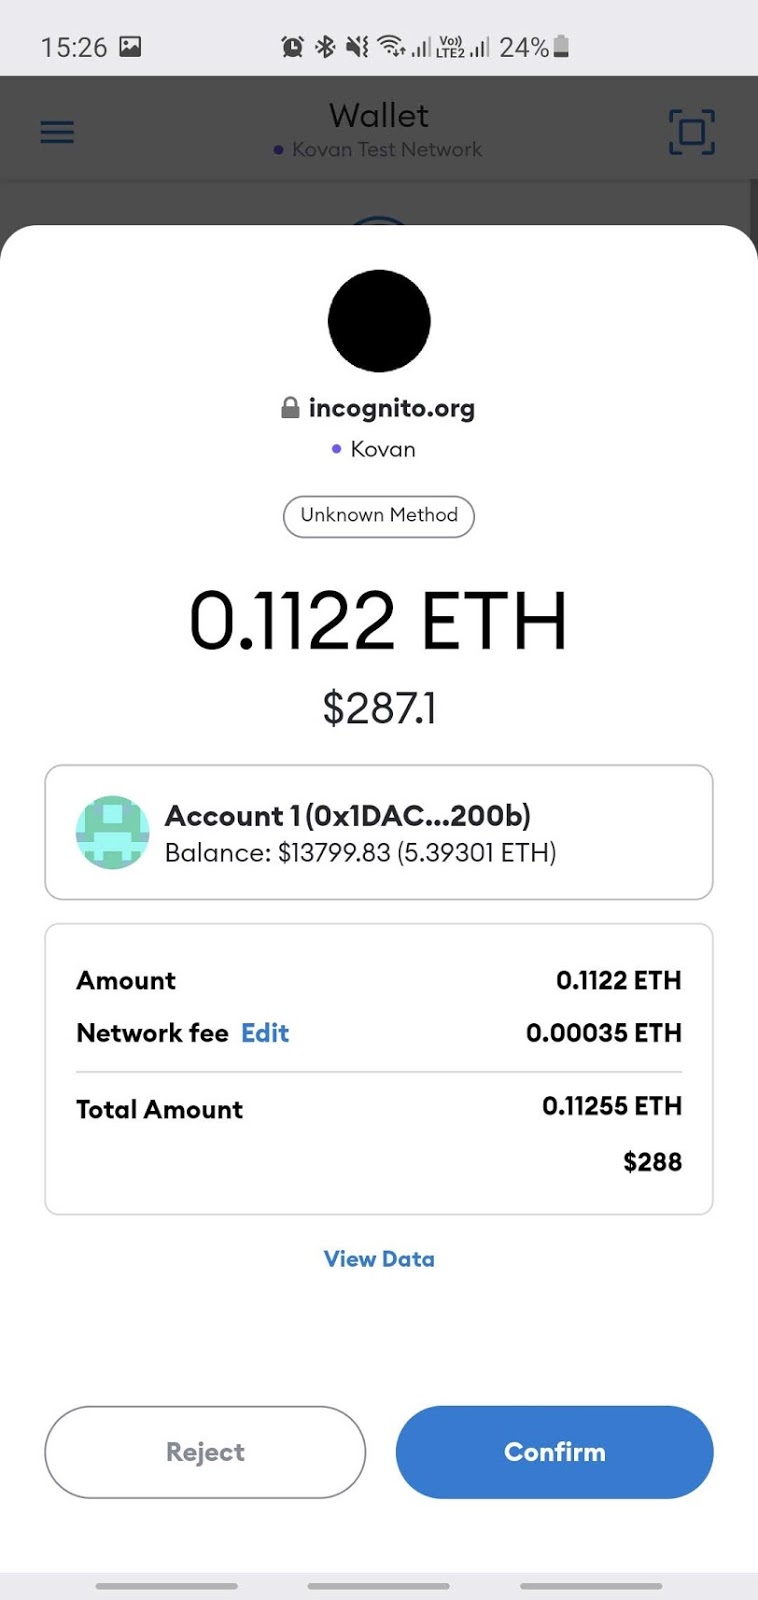
Input your amount to be shielded, then click on Shield button

Select Metamask to continue
Wait a few seconds, Metamask will show a transaction confirmation and wait for your approval. If everything is OK, click Confirm, Metamask will submit this transaction.
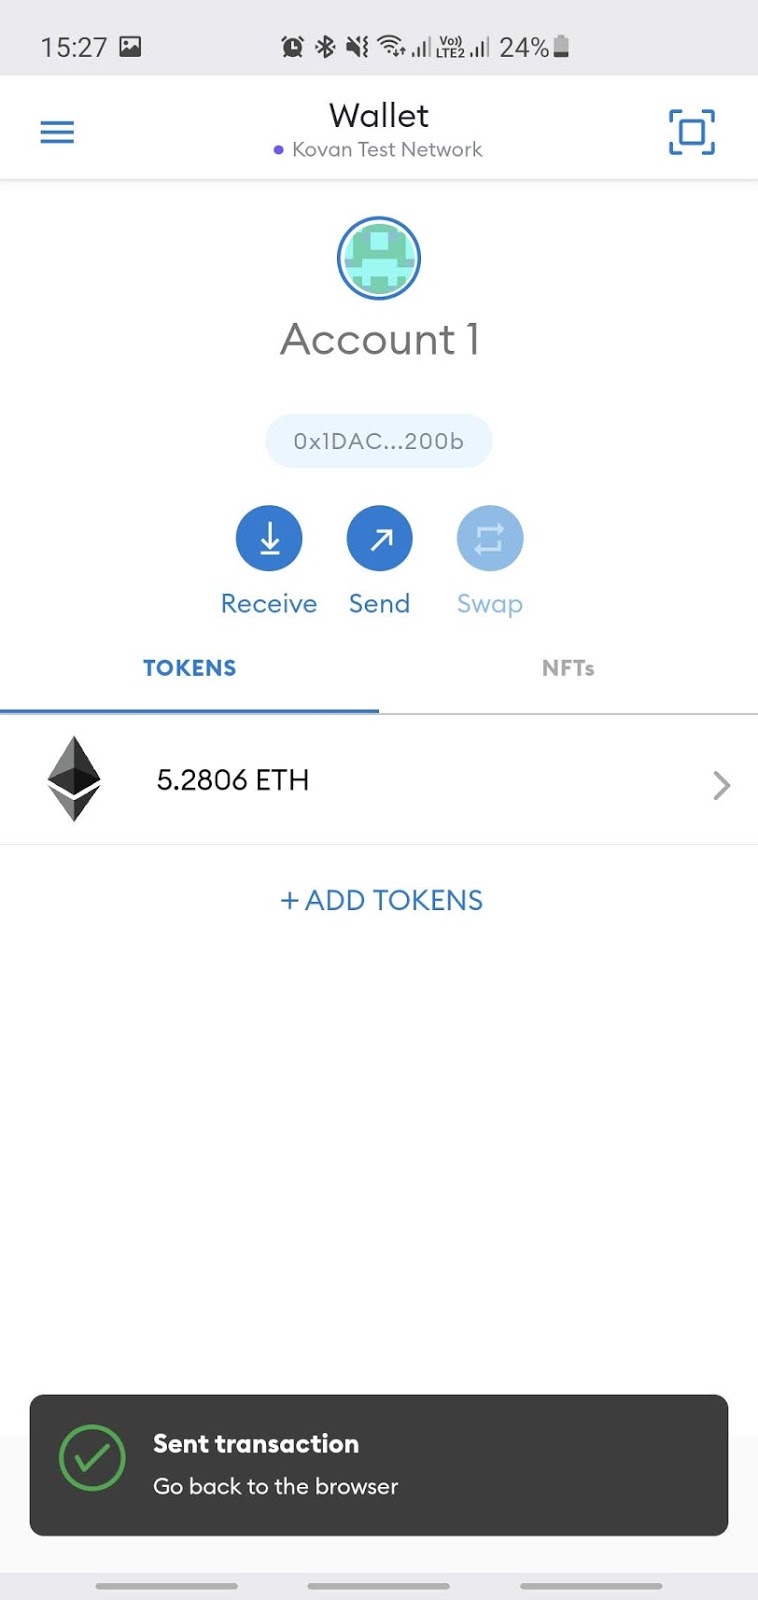
Transaction sent! Now go back to Incognito Wallet to check the result.
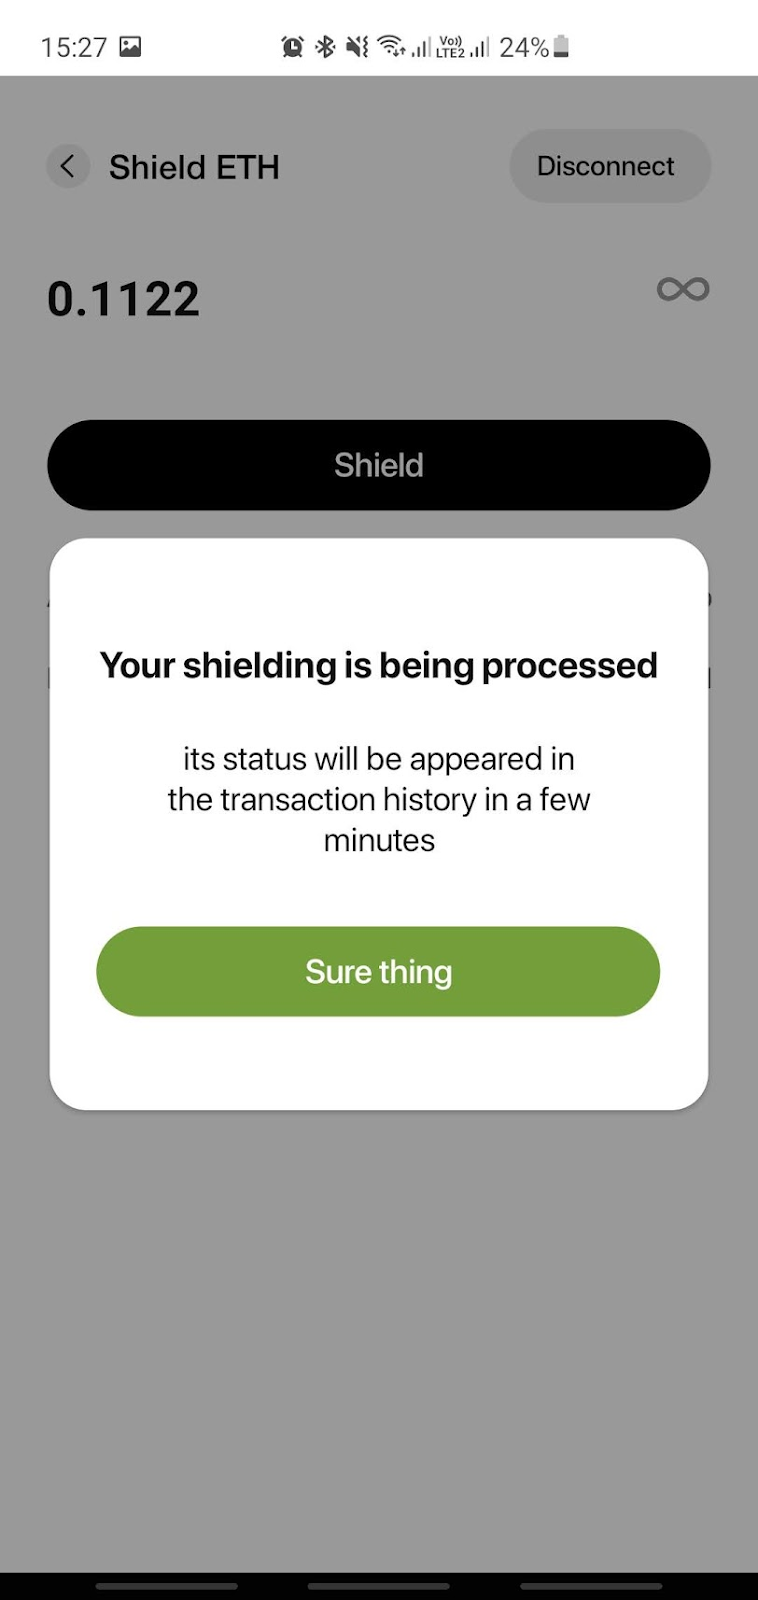
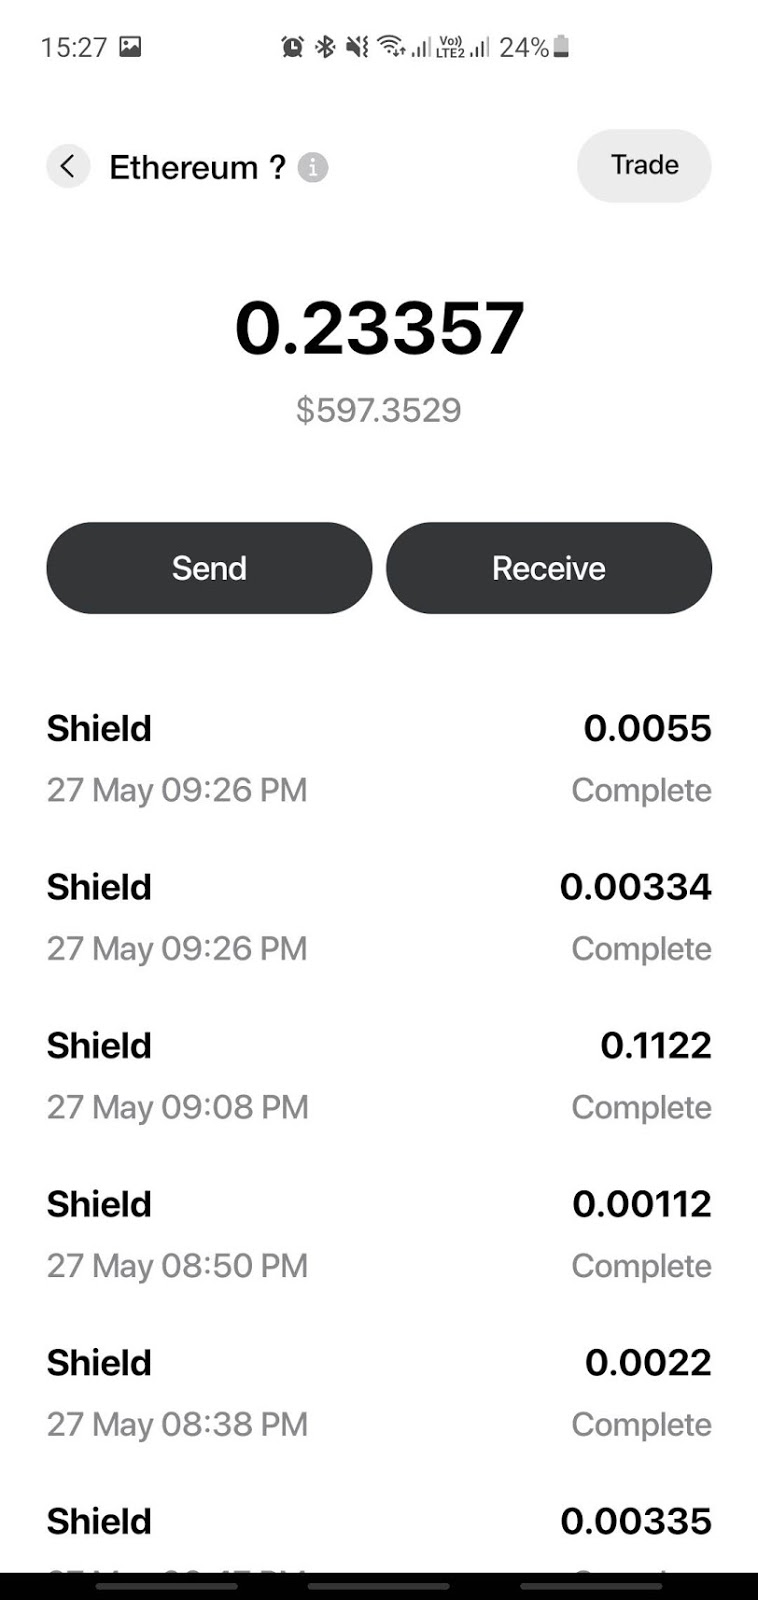
You can click on Sure thing to view your shielding history. Remember that your recent shielding will only appear here when the background jobs start processing it. Keep calm and check later.
That’s it, please give it a try and let us know your thoughts, thanks!

