
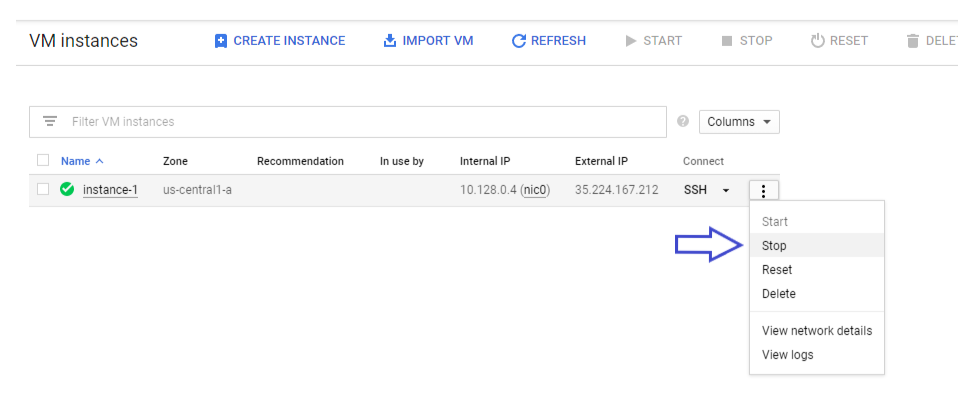
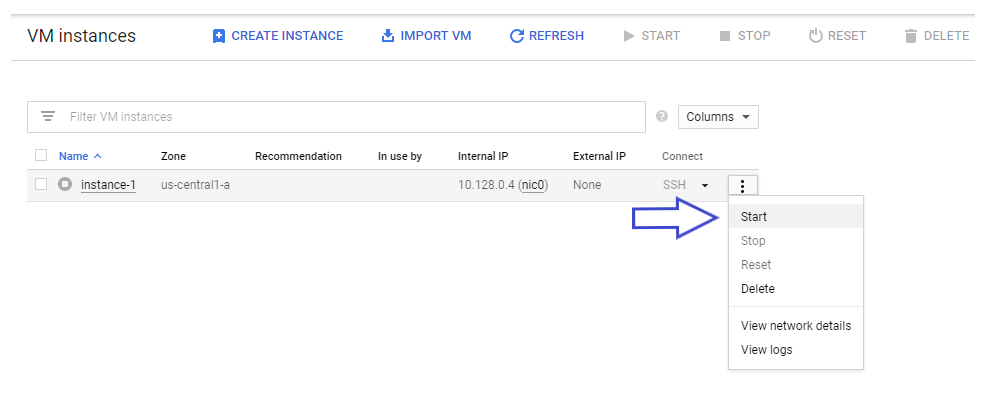
1/ In VM instances page, click on three-dot symbol to stop the instance
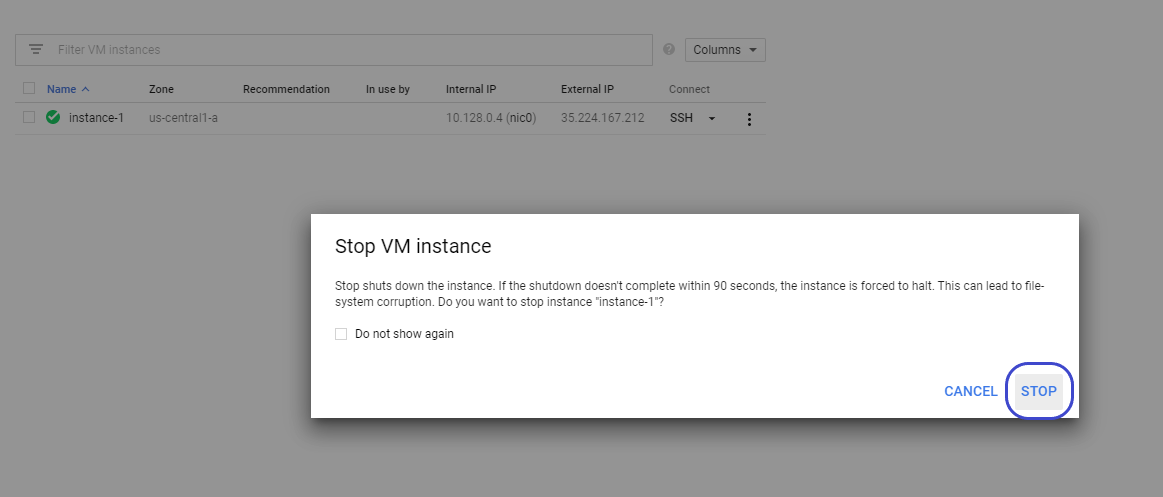
Click stop to confirm
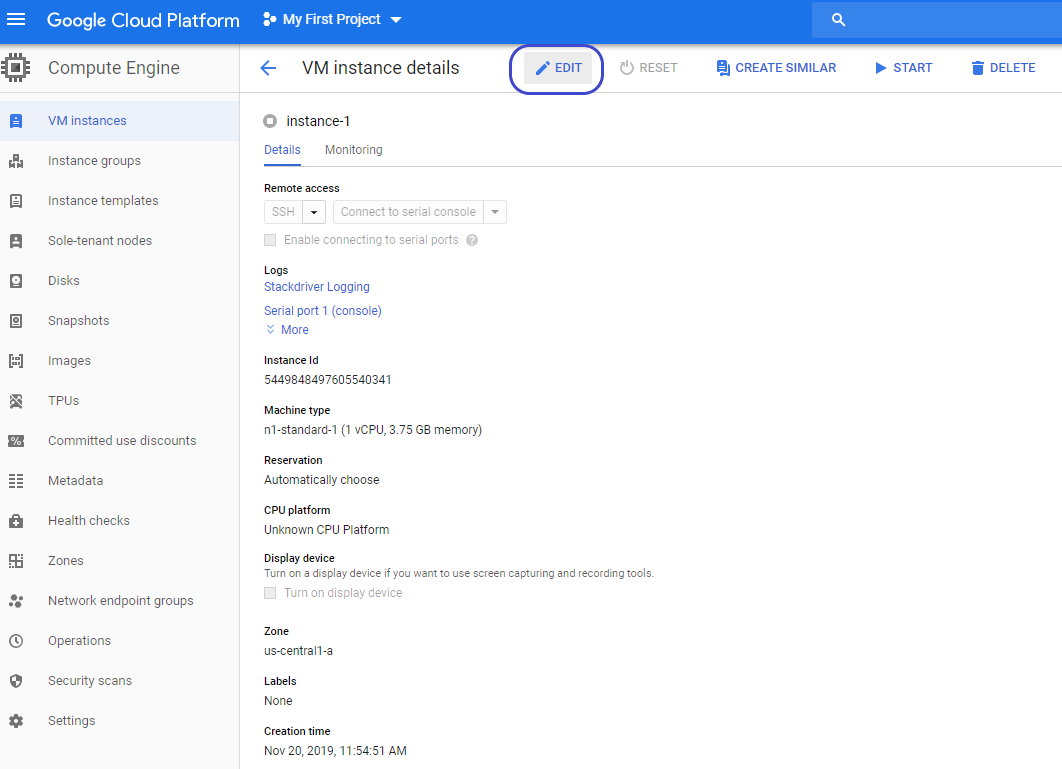
Click on your instance to get inside. Then click on Edit as below:
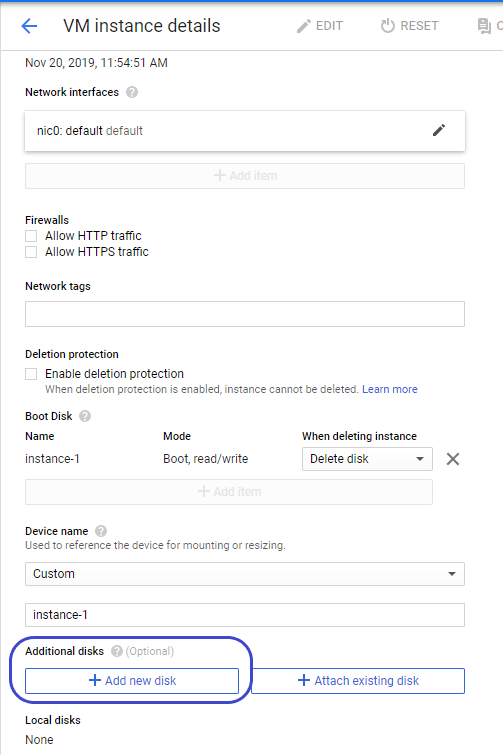
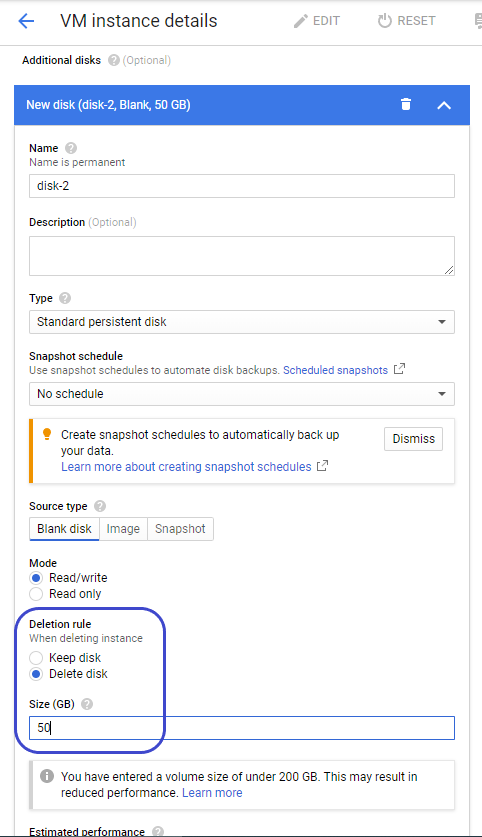
Scroll down to find the Boot Disk section. Click Add new disk
In Deletion rule, choose Delete disk. Then input the size you want to upgrade. For example, we increase the capacity from 10 GB to 50 GB
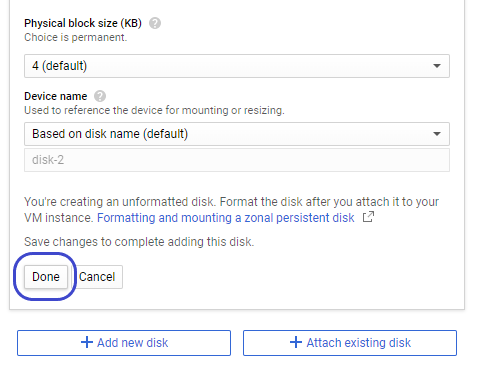
Click Done to finish. Then click Save to save your setting
Next, let’s run your instance again, and format the new disk partition
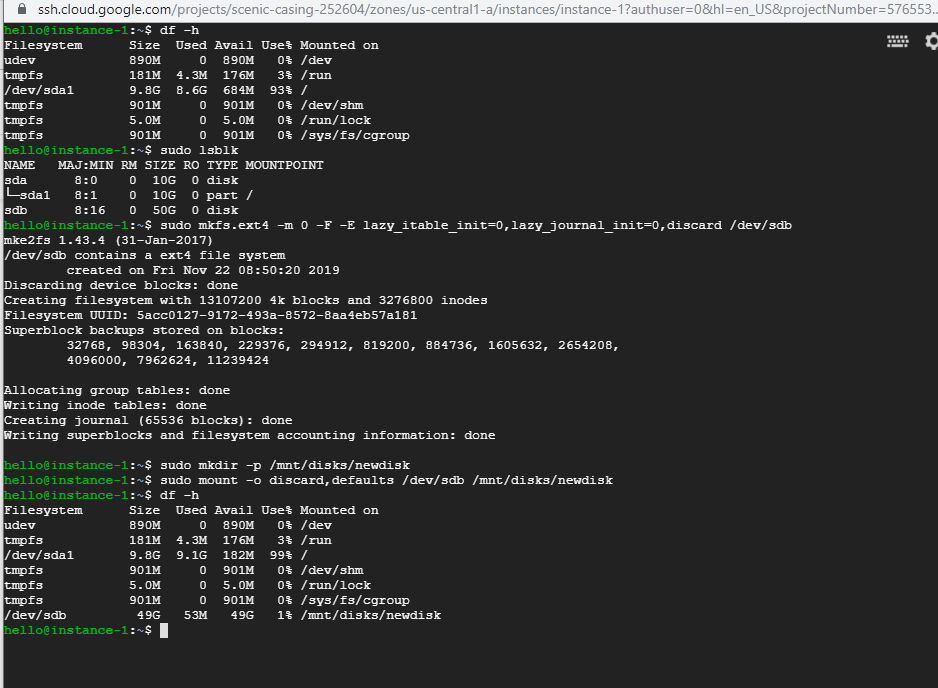
Ssh to your server, then input these commands: sudo lsblk sudo mkfs.ext4 -m 0 -F -E lazy_itable_init=0,lazy_journal_init=0,discard /dev/[DEVICE_ID] sudo mkdir -p /mnt/disks/[MNT_DIR] sudo mount -o discard,defaults /dev/[DEVICE_ID] /mnt/disks/[MNT_DIR]
For example, after “sudo lsblk”, I got the ID of new disk is “sdb”: sudo mkfs.ext4 -m 0 -F -E lazy_itable_init=0,lazy_journal_init=0,discard /dev/sdb Next, I create a folder “newdisk”: sudo mkdir -p /mnt/disks/newdisk Finally, I mount the disk to the instance: sudo mount -o discard,defaults /dev/sdb /mnt/disks/newdisk
Next, we stop the current Virtual Node and remove it completely. We need to run your virtual node on the new disk now. After removing the Node, please input these commands. Remember to replace validator_key with your VALIDATOR KEY: cd /mnt/disks/newdisk curl -LO https://incognito.org/run.sh && sed -i s/xxx/validator_key/ run.sh && sudo bash run.sh

This is the instruction link from Google: https://cloud.google.com/compute/docs/disks/add-persistent-disk