Hello node operators,
Staking Flow v3 was successfully rolled out. Going forward each node will sync beacon data & 1 shard’s worth of data. Each node was assigned to a random shard. Below are the steps to clear all other shard data for unneeded shards.
 To avoid possibly getting slashed please make sure your node is not in committee or about to be in committee before you follow this guide.
New vNode Operators: When requesting to un-stake your vNode must go through committee prior to your stake of 1750 PRV being returned to you.
Step 1 - Update Node
Before continuing to Step 2, please ensure your node is running the latest docker tag of 20211005_1 by following instructions in this Step 1. This guide has been broken up into sub-parts depending on pNode (#a) and vNode (#b) instructions when appropriate.
Step 1a - pNode Docker Tag Update
Access your pNodes Dashboard with (change **pNode_IP_Address**):
http://pNode_IP_Address:5000
You can locate your pNodes IP address in the app:

If your app does not show an IP address here please refer to your router’s config or use the FING app (www.fing.com).
Now click Terminal button at the top of the page.
Next, find the button Restart Docker and press this button. During this process, your node will check for any new Incognito updates and apply them. Please note you will have to confirm this action by clicking Yes as seen in Figure 1 - Update Docker & Confirm (both buttons are indicated with magenta squares highlighting them).
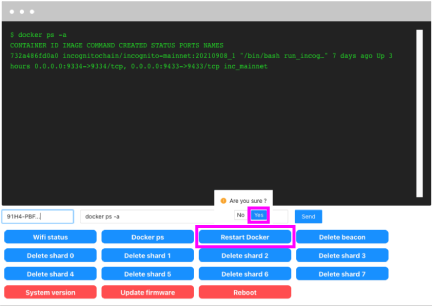
Figure 1 - Update Docker & Confirm
Step 1b - vNode Docker Tag Update
Note: Commands for vNodes assume you are running with root permissions. If not, sudo should be added to the beginning of each command.
First, let’s check for updates to your server (this should be run weekly or monthly to maintain the security of your server):
apt update && apt upgrade -y
After that has finished, shut down your Docker containers with:
docker container stop $(docker container ls -q --filter name=inc_mainnet_*)
After this has been completed re-run your install script with:
./inc*
After roughly 3 minutes, you can continue on to Step 2.
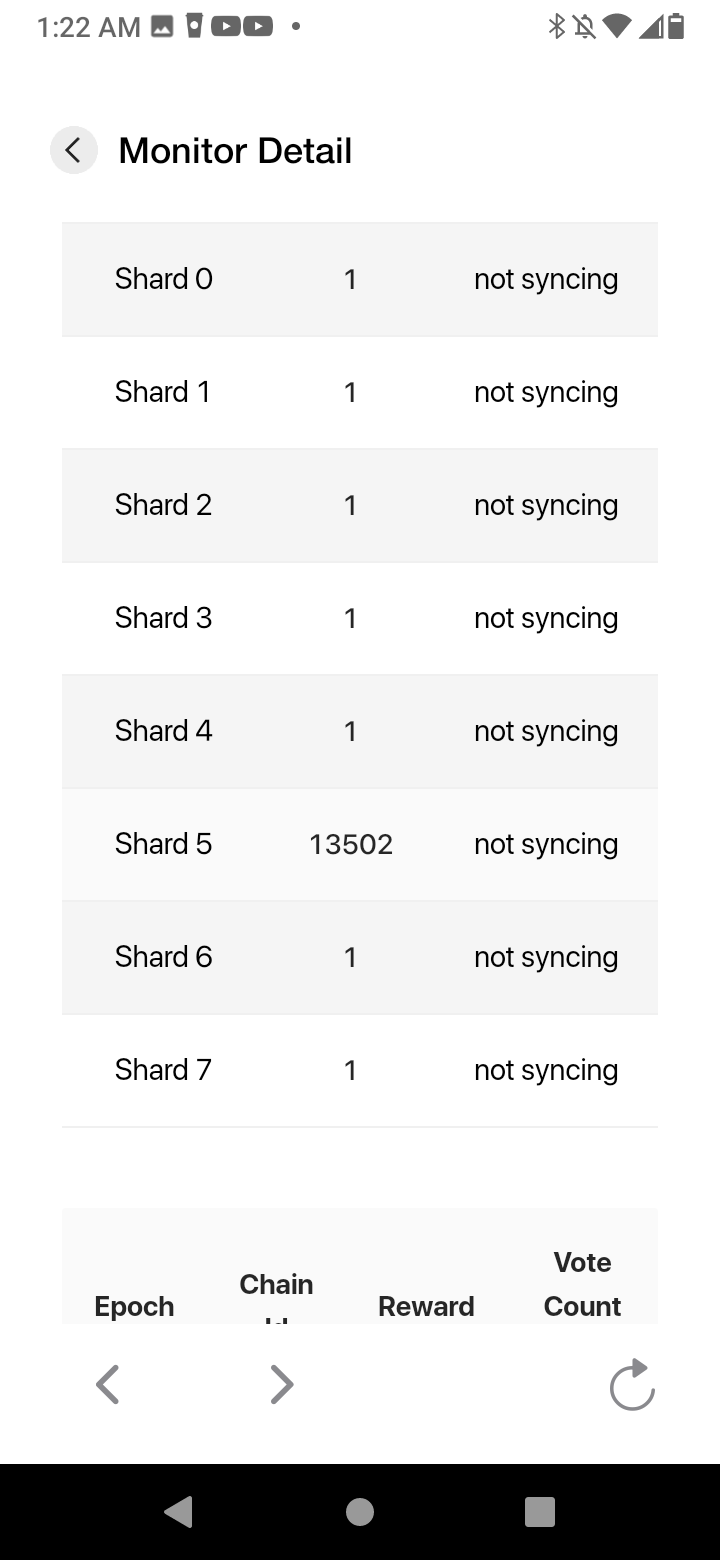
Step 2 - Check Assigned Shard
Go to the Node Monitor. On this page check which shard your node has been assigned. Make note of this shard number somewhere as it can get confusing if you have multiple nodes.
Step 3 - Remove Unneeded Shard Data
Step 3a - pNode Shard Removal
Access your pNodes Dashboard with:
http://pNode_IP_Address:5000
Next click Terminal at the top.
You should now see buttons at the bottom like Delete Shard 3 & Delete Shard 4, etc (as referenced in Figure 2 with a magenta box surrounding).

Figure 2 - Shard Delete Buttons
Go through and click each button one by one, avoiding the shard that your node has been assigned to. Please allow some time after each button press. You should see the output of the button press in the terminal.
After you have clicked to delete each un-needed shard’s data click Reboot. This will reboot your pNode and only sync your assigned shard data.
Step 3b - vNode Shard Removal
Begin by stopping your Docker container from running (replace # with your docker container number, counting starts at 0):
docker container stop inc_mainnet_#
Access your vNode and send the following commands to remove each unneeded shard data.
Use the following command to enter into your nodes data folder (Please note you will have to change the # to the correct node, for those who run multiple nodes. Node counting begins with 0):
cd /home/incognito/node_data_#/mainnet/block/
Next, we will delete each unneeded shard #. Run the following code changing the # to each unneeded shard; avoid the shard # you have been assigned to.
cd shard#/ && rm -rfv * && cd ..
For example:
Let's say our node was selected for shard 4. We would run the following:
cd shard0/ && rm -rfv * && cd ..
cd shard1/ && rm -rfv * && cd ..
cd shard2/ && rm -rfv * && cd ..
cd shard3/ && rm -rfv * && cd ..
Skip shard4
cd shard5/ && rm -rfv * && cd ..
cd shard6/ && rm -rfv * && cd ..
cd shard7/ && rm -rfv * && cd ..
If more than 1 vNode runs on this same computer/server re-run Step 3b for each remaining vNode.
Restart your vNode(s) with the following:
cd && ./inc*
In Review
Congratulations, your node is now running with only beacon & 1 shards worth of data. This is a huge improvement that should allow pNodes to run for several years without needing to upgrade the hard drive. pNode operators should get slashed less often (if at all) due to the sync pool that was added. This improvement allows both pNodes and vNodes to sync faster due to only having to download 1/8th of the previously required shard data. Node operators should also see a decrease in bandwidth usage. Please do me a favor and take a few seconds to leave a comment below showing the devs some love  for this awesome update!
As usual, if anyone has any questions, comments, or needs anything clarified feel free to post below or message the @support account.