
Incognito is happy to announce the release of v2.0.0 firmware for pNodes! 
Steps to upgrade:
1.) Make sure your pNode is plugged in  and connected to the internet
2.) On the app to go Power > tap your node > follow the instructions to upgrade
 During this time do not unplug the pNode as it is downloading the necessary data to perform this upgrade automagically, unless instructed to do so.
After the upgrade is complete your pNode version will be v2.0.0 as shown in figure 1.

figure 1 - pNode Version
Congratulations on successfully upgrading your pNode to the latest and greatest firmware! Below is an outline of how to access the new and improved features of your pNode.
Didn’t upgrade? If your pNode ran into a problem and still does not show v2.0.0 please follow the following advanced instructions. On your computer open a terminal (windows search Windows PowerShell / on mac /Applications/Utilities Terminal) and type:
ssh nuc@pNode_IP_Address
(replace pNode_IP_Address with your pNode IP Address)
hit enter
When prompted for a password type:
Binh!2345
Once logged in type the following and hit enter:
s2b -d ‘{“action”: “update_firmware”}’ -t product_control
sudo service supervisor restart
sudo service nginx restart
You can copy and paste to make things easier. Copy from here and then right-click on the terminal screen.
another way you can keep ssh with manual detail command to download and replace new pnode ui.
script :
cd ~/aos/ability/
wget http://s3.amazonaws.com/robotbase-cloud-2/static/upload_apps/product_control_2.0.2_2_411.zip
unzip -o product_control_2.0.2_2_411.zip
cd ~/
tmux kill-session -t brain
bash ~/aos/boot.sh
sudo service supervisor restart
sudo service nginx restart
Wait for the upgrade to complete. After the upgrade has completed your pNode should now be on v2.0.0
What’s New?
Access your pNodes dashboard by going to the following URL in a web browser (replace pNode_IP_Address with your pNodes IP Address):
http://pNode_IP_Address :5000
Main Page
Your pNodes dashboard should look like the image below. On this page, you can find all the important information related to your pNode (reference figure 2).
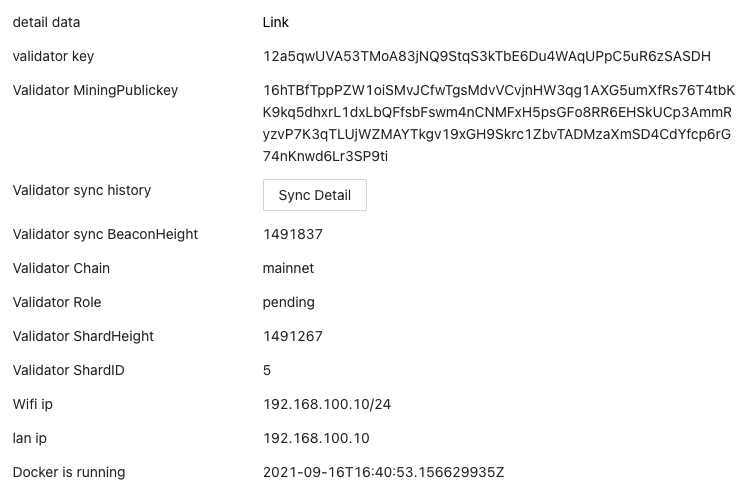
Figure 2 - pNode dashboard main screen
Sync Detail
Clicking the Sync Detail button will display your pNodes Earnings and Vote status (reference figure 3).
![]()
Figure 3 - pNode Sync Detail Button
Terminal
Clicking the Terminal button at the top of the page will display the following (reference figure 4):

Figure 4 - pNode Terminal Page
The terminal page gives you access to a terminal running on your pNode. Please note this is only recommended for advanced users.
There are convenient quick access buttons located below the terminal window. In the event of a beacon and/or shard stall these buttons can be utilized to clear problematic data.
When clicking to delete data a confirmation box will pop up asking you to verify deleting data. Please only use these buttons when a stall occurs or as directed by the support team.
Please put your pNode QR code into the box referenced in figure 3 prior to utilizing the quick action buttons (pNode QR codes are located on the bottom of the pNode device).
File Explorer / Logs
In the event you need to browse the pNodes files or pull logs you can do so by accessing the file explorer by clicking the Browser button at the top (reference figure 5).

Figure 5 - File Explorer
Changing Wi-Fi
In order to change your pNodes Wi-Fi connection click the Wifi button at the top of the page. Figure 6 shows the Wi-Fi settings screen. On this page, you can input your new Wi-Fi configuration if you need to change Wi-Fi routers.

Figure 6 - Wi-Fi Settings Page
Changing Validator Key
To self stake your pNode you will need to have a wallet with 1750 PRV and provide your wallet validator key into the Validator Key box provided (reference figure 7).

Figure 7 - Validator Key Self Stake
As usual please post any questions you have in the comments below or reach out to the @support account.


